The Holidays are just around the corner. Stores are all decked out with holiday decor. Trees glisten with LED lights while images of Santa and Manger scenes sit on shelves. Ornaments hang overhead and the smell of Christmas seem to permeate the air with aromas of cinnamon and spiced apples.
Every year, I make a simple wreath. It is part of my journey to create stunning Christmas decor without breaking my budget. The one place that I can do this is the Dollar Tree.
This year, I made this simple, yet elegant Snowman wreath with items that I got from the Dollar Tree.

The items that you will need for this Snowman Wreath are:
Christmas House Faux Pine Wreath . I used one that was 18 inches and another that was 15 inches. I found them in store but found the link to this wreath online. I am sure you can use a different kind of wreath if this one is not available.

You will also need: Plastic Snowflake ornaments
Snowman's hat ornament
LED Lights

1 Christmas House Red Ribbon

Glue sticks
Glue gun
Zip ties
Instructions:
1. Using 2 zip-ties, connect the smaller wreath to the larger one to get the shape of a snowman.

2. After connecting the two wreaths, simply "fluff" out the wreath, as in the photo.


4. Here I was simply testing out the poinsettia ornament that I would be using as the scarf.

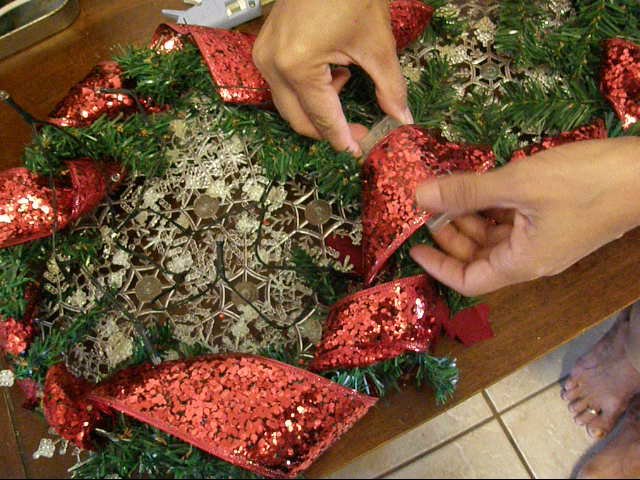
5. Open the ribbon. Tie one end to the bottom of the large wreath. Weave the ribbon in and out of the two wreaths until you get back to where you began. I only needed one roll of ribbon. If you use larger wreaths, you may need more ribbon.


6. Experiment with the snowflake ornaments, until you get a desired opacity. You may use more that 10.

7. Remove the hanging string from the ornaments. Start gluing the snowflake ornaments into a circular shape, like in the next image.


8. Place the glued ornaments onto the large wreath and start to secure it using hot glue and the fronds of the wreath.


9. Repeat steps 7 and 8 for the smaller wreath.

10. Place batteries into at least 2 of the LED light sets. Follow instructions on the packet to remove the cover, place the batteries and replace the cover.

11. Glue the battery pack into part of the ribbon so that you can remove it easily when the batteries need to be changed. Repeat for the smaller wreath.
12. Connect the string of LED lights to the wreath using the fronds. You could also use zip ties for this step. Check out the video below for more details on this step.

13. Once the lights have been attached, glue on the snowman's hat and the poinsettia in your desired location.


Completed Snowman Wreath

Here it is hanging on my front door.

If you would like to watch the video for more detailed instructions, you can do so here:
Merry Christmas!!
**I was compensated for this post. This post also contains affiliate links and I will be compensated if you make a purchase after clicking on my links.
Email Sign Up
No comments:
Post a Comment